Showing posts with label spectrum aqua markers. Show all posts

Monday, July 10, 2017

Lawn Fawnatics Challenge #8: Summertime Fun


It's challenge time over at Lawn Fawnatics! This is challenge #8 which is summertime fun. 
I mean, we are in the thick of summer right now, so inspiration is all around us. 
I love to make a little scene with a simple greeting as I did in my card for this challenge.


I love watercoloring, so I used watercoloring on each of my elements. 
The picket fence diecut I just left white and watercolored my green right up to the curve. 
I embossed the hello greeting in white to make it stand out ever so slightly. 


I also gave the clouds a bit of a blue tone. The sky is actually just 
a light blue cardstock underneath my watercolor paper diecut.  

I hope you're inspired to play along with our challenge. 
It ends in a week, so be sure to get your project entered for a chance!  


Monday, October 17, 2016

Lawnscaping Challenge #140 sponsored by Lawn Fawn


There's a new challenge that's perfect for fall - COLOR SCHEME. Just use purple, black and a color of your choice! I can't wait see what you all come up with.

We are sponsored by the always amazing Lawn Fawn! Those folks just rock and they are sponsoring this challenge with a free stamp set of the winner's choice! So many stamp to choose from, I know. It's tough. We just heart them! Thank you Kelly Marie and gang for sponsoring us! 


I had so much fun creating this card!!! As I've said many times before, I LOOOOOOVE Halloween. Everything about October is amazing to me. So I had to make a cute little card wishing someone a spooky Halloween...


As you can see, my color of choice was olive green. 
That's the perfect compliment for this card I think!


I decided to really make this little vampire pop by putting him hanging from a branch.
Such a simple touch, but I really think it makes the card!


I wanted a soft purple to contrast with the dark olive and black, so I turned to my watercolor markers, watercolor cardstock and some water. I did flick on some black and white spray mist for an added touch. If you look closely, you can see in white where I stamped little stars. VERY subtle. 


I popped up the wings and the ghost vampire off the background as well as the entire watercolored panel to give it some interest. 

This was so much fun. I encourage you to have 
a blast with this and enter the challenge HERE!  

PRODUCTS USED:
  • Lawn Fawn Booyah
  • Lawn Fawn Love You S'more
  • Memento, Tuxedo Black
  • Memento Luxe, Wedding Dress
  • Spectrum Aqua Markers
  • Spectrum Aqua Watercolor Cardstock
  • Heidi Swapp Color Shine, Black Velvet
  • Studio Calico Mister Huey's Mist, White


Monday, December 21, 2015

Lawnscaping Challenge #120: Christmas Sponsored by Lawn Fawn


Good morning! Happy Monday all! There is another fab challenge up on the Lawnscaping Challenges blog today. Perfect theme for this month - Christmas!


We are sponsored by the always amazing Lawn Fawn! They are sponsoring this challenge with a free stamp set of the winner's choice! So many stamp to choose from. They're awesome!


Here is the card I've come up with for this fun challenge. I adore the Beep Boop Birthday set a lot, so I wanted to transform one of the robots to be a bit more festive! Isn't he so cute?! He's helping to decorate for the holidays!


I used the hat and scarp from the Baaah Humbug set as well as the string of lights. I also pieced together the sentiment label using the "gear up for a" from the Beep Boop Birthday set and the "Happy Christmas" from the Oh Snap which I cut out using the Stitched Labels dies. I added in the red bow at the bottom for a pop of color. 

The snow you see is just some ink I flicked on with my Spectrum Noir Sparkle Pen in Crystal Clear. It gives this gorgeous shimmer and it's perfect to use for snow! I also added that in on the ball and trim of the Santa hat as well as using a red Sparkle Pen for the hat and bow. 


I hope you play along with us for this cheery challenge! Be sure to read the rules on the Lawnscaping Challenge blog and enter. Good luck and deck the halls!

SUPPLIES USED:


Monday, November 2, 2015

Lawnscaping Challenge #117: Thinking of You Sponsored by Ellen Hutson


Good morning! Today is another fun challenge day with Lawnscaping. Today's challenge is Thinking of You (Hope, Love or Encouragement).


The wonderful, fabulous Ellen Hutson! is sponsoring this challenge!!! Certainly you are familiar with her and her store, but if not, a little bit about the store in her own words:

Ellen Hutson, LLC began their adventure in November 2006 as an online web store committed to bringing you the finest paper crafting products and related product education. They are always looking to provide their customers with quality products, excellent customer service, and education and inspiration for the products they carry. You can shop with Ellen by clicking HERE. As well please join them to be inspired and learn some fun techniques in the CLASSroom, or stay up-to-date on FacebookYouTubeInstagramTwitter, and/orPinterest.


Ellen Hutson will be sponsoring our first challenge of each month in 2015! The prize? A $25 gift certificate to the online store! Thank you Ellen!


Having cards of encouragement are always great to have on hand for when you need them! Sometimes a pretty card in the mail is just the pick-me-up someone could really use.

I created this with a lot of white space but yet with a lot of color! Here is what I made:


What I did was create a mask from a sticky note so that I could overlap my flowers from the Flutter By set on the right edge of the card. I colored them in using my Twinkling H20s. They're these beautiful watercolors with a brilliant shimmer to them. Sadly, you can't see that in the photos, but they're so pretty in person. Then I cut out the negative space left in between them. I did this so that I could sneak a patterned paper behind them so they would pop off the card. Love this technique. 


For the sentiment, I masked out part of it so that I could stack it. It comes all in one line. You can always cut apart your stamps, but I wanted to leave it all in one line and this is a great way to do that. Just mask out what you don't want to stamp. I used Golden Glitz on this for a sparkle to coordinate with the colored flowers on the right.

I simply flicked on some of the turquoise blue H20s with my water brush pen. Simple look and it adds some bright little dots of color to your projects. 


To finish off the card, I added some simple rhinestones in the center of each flower and tied on a twine bow next to the sentiment. 

I hope you're inspired to have a fun time creating for this challenge! Make sure you check the Lawnscaping Challenge blog for full details on entering to win. 

SUPPLIES USED:


Monday, July 20, 2015

Lawnscaping Challenge #110: COLOR Sponsored by Lawn Fawn

Good morning! I'm back with another fun challenge for Lawnscaping today. Here it is:


Our sponsor is none other than the amazing Lawn Fawn. Play along with the challenge, COLOR, inspired by the rainbow to win a fab prize from them. And to just get creative with color and have fun!!


I had a ton of fun creating this card today with the current challenge. Color is such a fun thing, isn't it?? I really wanted to incorporate all the bright colors we see in the rainbow and just give a feeling of summer. So I grabbed the Let's BBQ set and started getting creative. I stamped my images from the set onto some watercolor cardstock and began to color in with my Spectrum Noir Aqua Markers. I stamped the grill, kabob, and little flames and colored each separately. I then fussy cut them out (you can certainly use the coordinating dies for a quicker process) and assembled my little grill. 


The clouds were fun. I actually used my Spectrum Noir Aqua Markers and my water brush pen with a scrap piece of watercolor cardstock and colored in no particular fashion. I then took some cloud dies I have in my supplies and cut them out and set them aside. I love how you can see the variation in color in them! Like true clouds. 


 Now, on to how I assembled my card in steps.
  1. Cut your card base, score and fold to 4.25x5.5. I used white cardstock for this card. 
  2. I took a piece of red polka dotted paper and cut to the same size as my card front, 4.25x5.5. Adhere. 
  3. I pulled in a fun gingham paper in a soft green and white and cut a little smaller than my card size and glued on a slight angle. 
  4. For the yellow piece, I took the yellow striped paper from the Let's Polka 6x6 Paper Pack and cut a smaller piece (roughly 3x4) and rounded the two right corners. For some fun, I used Distress Inks in Spiced Marmalade and Scattered Straw with two different stencils I have. I used a honeycomb and dotted stencil. This gives a little more color to the card and a fun element!
  5. I glued that down on an angle and stuck on my clouds with some foam adhesive. 
  6. For the smoke from the grill, I inked that up with Memento Luxe in Grey Flannel. I decided where I'd want the grill to be place and I stamped the smoke. I then adhered the grill over that with some foam adhesive. 
  7. I love the sentiment in this set that I chose, relish the day, because really, we all truly relish these beautiful summer days spent grilling and being outdoors, right? So I found some fun tickets I had in my stash and decided to stamp right onto the ticket. I stamped it Memento, Tuxedo Black and the word day, I stamped onto my watercolor cardstock scrap with Memento Luxe in Love Letter and cut that out and adhered with some foam adhesive. Gave a little pop of color and dimension.
  8. I glued my ticket strip to the card and trimmed off the overhang from the top. 


And there you have my fun, summery card! I hope you join us and play along with the challenge. Take a look at all the design team's projects as well! I truly am on a team of very talented ladies!! 

Saturday, April 25, 2015

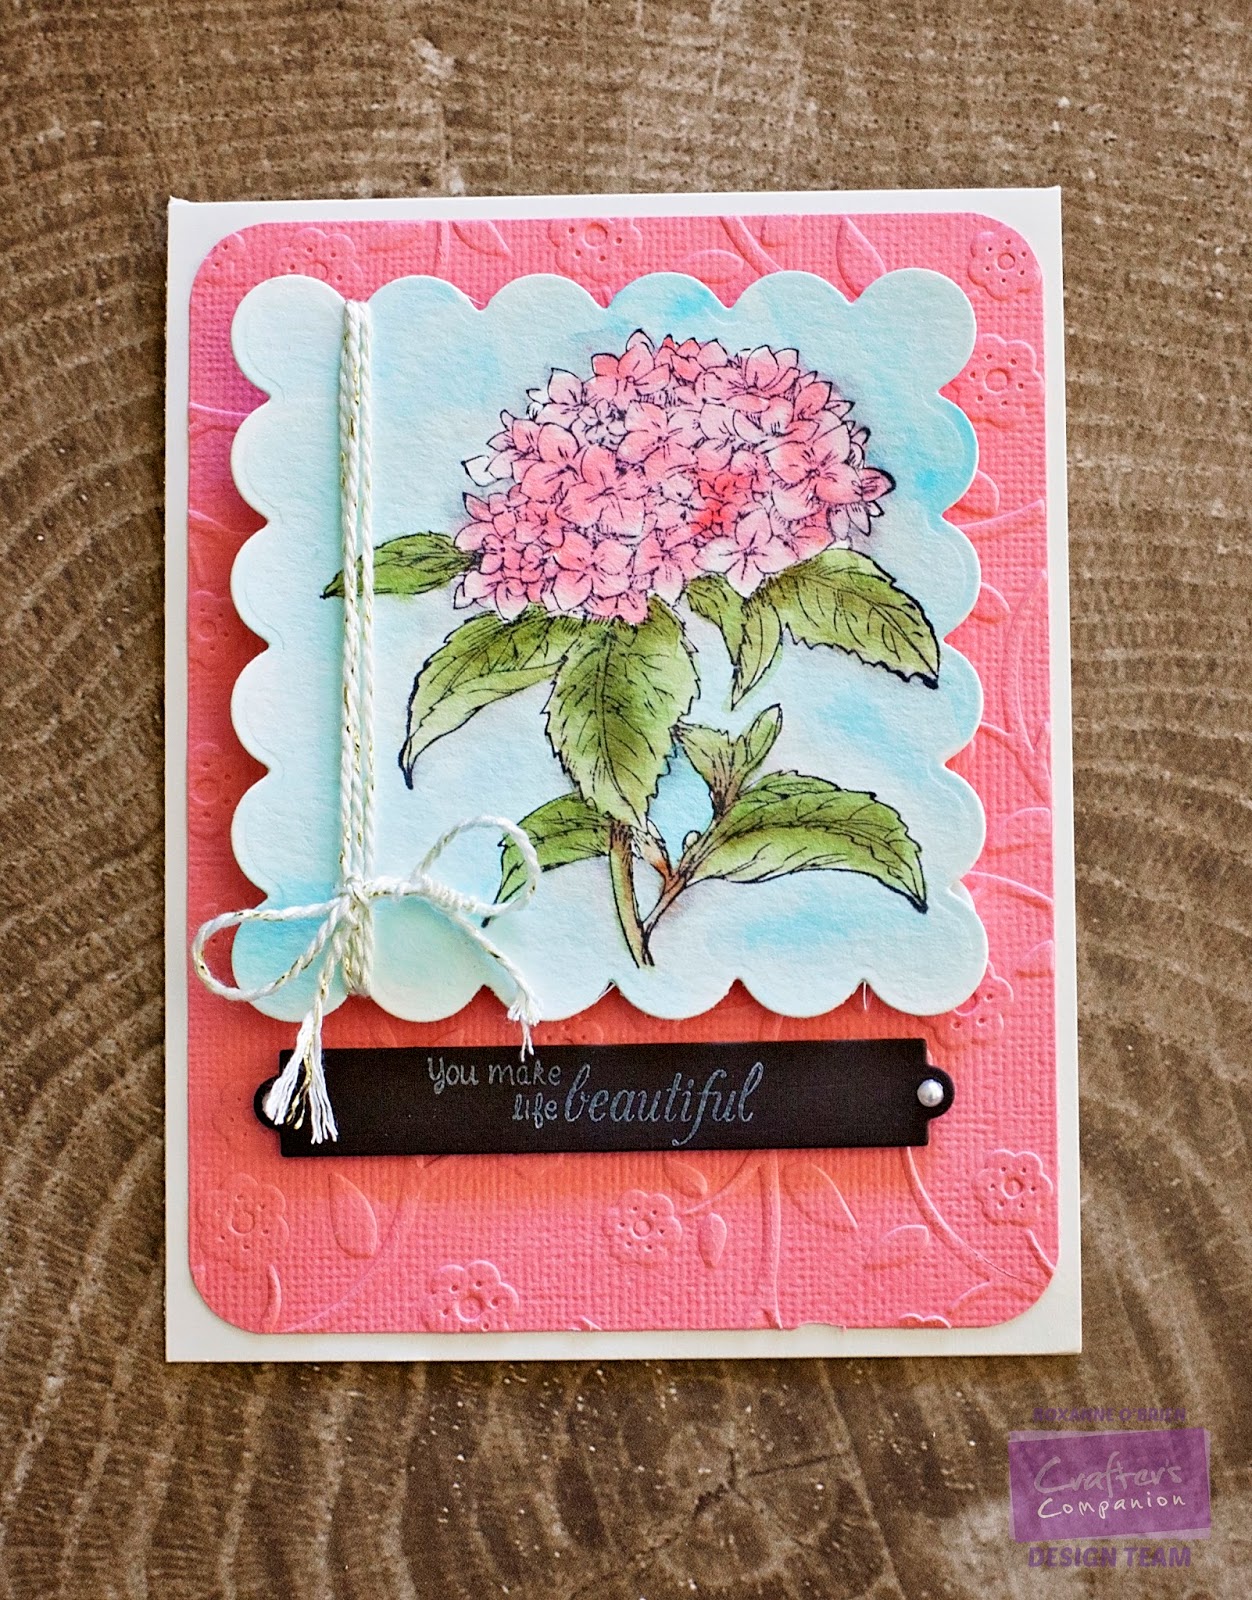
Beautiful Hydrangeas


Nothing says spring like flowers to me. I chose the hydrangea image from the Stamp-It Australia, Floral Fancies set. I diecut the watercolor paper using my Die'Sire Essentials, Scalloped Squares die (the largest one) and stamped the image onto it, moving it flush right, with Memento, Tuxedo Black. I then colored it in using Spectrum Aqua Watercolor Markers in Aquamarine (background), Moss, Leaf Green, Chocolate, Blossom, Begonia and Slate (shadowing). 


I used some pretty white/gold twine in my stash and tied it around the left side of the diecut square.
For the pink background, I used a color that coordinated with the hydrangeas I colored, and used the Flowers & Vines embossing folder. I then rounded the corners and adhered to my card base. I then used foam adhesive to glue the hydrangea square to the pink embossed background. 


The sentiment is from the Bebunni Floral Collection, Flower Garden. It's just a pretty and soft font! I used Memento Luxe in Wedding Dress to stamp it onto the diecut banner piece. I used simple white pearls on the ends to dress it up. 

I hope you enjoyed this card! This would be perfect for Mother's Day coming up. Click on over to Crafter's Companion to see all the beautiful sets you can use to create your Mother's Day card and gifts!

Saturday, April 18, 2015

Hello Hibiscus


Hello! I have a fun and bright card to share today. I have stepped out how I created this below along with links to each supply I used from Crafter's Companion


1. Cut/score orange cardstock base to 4.25x5.5. 

2. Cut small strips of Shimmering Cardstock in Green Envy. Set aside. 

3. Cut sheet for watercolor images. I wanted to create my own patterned paper with this card using a lot of color, so I stamped the small hibiscus image from the Stamp-It Australia, Floral Fancies set with Memento, Tuxedo Black. I used Spectrum Aqua Watercolor Markers to color them in. I referenced images on Google for different colors these gorgeous flowers. I used Yellow, Sunset, Spice, Gold, Amber, Orchid, Heather, Wildflower, Begonia, Blossom, Orange, Rose, Pink, Crimson, Burgundy, Scarlet and Red Violet. To make it look like a true patterned paper, I used Sea Green to color in around the flowers. I love the way this came out, so I'll be doing this technique way more often! 

4. To make a soft sentiment focal point on this bright and busy background, I used a small piece of vellum and diecut it using the Die'Sire Essentials, Rectangles and I embossed it using the top of the Embossing Folder, Christmas Elegance. I used the extra strong permanent tape runner behind where I glued the sentiment to hide it.

5. I then used some little enamel dots for interest on the sheer piece. 

6. I assembled it all and there you go!


Saturday, April 4, 2015

Together Forever


Good morning! I have a really clean and simple, but stunning card, to share with you today. I just love when simple cards pack a punch.

Today, I created this:


Here is what I did for the card (links for supplies below as well): 

1. Cut and scored cream colored cardstock base for card. Folded size is 4.25x5.5.

2. Cut chevron patterned paper to fit onto the card base. I typically trim my pieces to show a bit of the base border, and they measure 4x5.25. 

3. I used the Die'Sire Decorative Dies, Butterflies die with Shimmering Cardstock in Black Pearl for the butterfly. I used some simple yellow enamel dots on the center of the body for interest.


4. For the main panel, I took a large acrylic block and colored, in no particular way, sections onto the block itself with the Spectrum Aqua Watercolor Markers. I used Yellow, Sunflower, Spice and Begonia. Then I spritzed water onto the block. Doing this blends the colors together in a beautiful way. The next thing I did was pressed my watercolor stock onto the block (not vice versa like you would when you're stamping). I let it dry and then stamped my sentiment from the Sentimentals, Vintage stamp set onto the watercolor piece. 

5. I chose to turn the watercolor panel just slightly for interest against the chevron patterned paper. 

6. I used foam adhesive on the back of the butterfly and adhered it to the upper left corner. 

I hope you enjoyed this! Definitely check out all the amazing products at Crafter's Companion today! 

Lawn Fawnatics Challenge #8: Summertime Fun

  It's challenge time over at Lawn Fawnatics! This is challenge #8 which is summertime fun.  I mean, we are in the thick of summe...