Showing posts with label rock-a-blocks. Show all posts

Saturday, February 27, 2016

Take Time Card


Happy Saturday everyone! Today's card is a quick and pretty springtime card I created using another Bebunni set! It's the perfect time of year for bunnies, anyway...

On to my card.


Doesn't this make you want springtime to just get here?? I just love it! And the sentiment is something I think we can all live by. 

I diecut a simple tag shape out of watercolour cardstock, stamped the Bebunni image onto it with Versafine in Onyx Black. I colored him in with my Spectrum Aqua Markers and water brush pen. I punched a hole in the center of the tag at the top and tied a charcoal color piece of twine through it. 

I used a simple white cardstock base trimmed, scored and folded to 4.25x5.5. I chose a pretty piece of patterned paper to use and glued that down to the center of the base. For some interest, I embossed a piece of smaller vellum and then glued everything down. I added the row of pearls at the bottom for that feminine touch. 


Grab all your crafting needs at Crafter's Companion!! Perfect for building up your stash of cards to have on hand to send whenever you need a card. Handmade is best! 

SUPPLIES USED:

Saturday, February 20, 2016

No-Line Watercoloring Best Wishes Card

Happy Saturday! I have one of my favorite techniques up on my card for today - no line watercoloring. One of these days I'll attempt to create a video for you. ;)


I know you're surprised...it's Bebunni!! Come on though. How can you NOT love him?! 

I inked up the image from the Bebunni Close To Your Heart, Special Friend stamp set with Distress Ink in Old Paper and stamped him onto the watercolour cardstock. For this technique, you'll want a very subtle color to stamp your images with so you get the effect of no-line drawings and simply the watercolor. After I stamped it, I rounded the bottom corners and started to watercolor. I used my Spectrum Aqua Markers for this with a water brush pen and colored away. For the details like the nose, whishers, etc. I used a thin black Micron pen and traced over the lines. 


The sentiment was stamped with Versafine in Onyx Black so that when I colored over it with that pretty yellow watercolor, it didn't bleed. I trimmed it out pretty close to the wording and set it aside.

My card base is a simple white cardstock that I cut, scored and folded to 4.25x5.5. I rounded the bottom corners and then adhered my colored Bebunni panel to the base. 

Since the top of the card needed something colorful and fun, I used two patterned papers from my stash and diecut two of the buntings out using my Die'Sire Traditional Bunting die. I adhered them with some foam adhesive. Just the right touch! 


I glued the sentiment in that open space just under the bunting on the right side, and that is all! Very cool technique. I encourage you to try it. It's addicting. Visit Crafter's Companion and if you haven't purchased any of the Spectrum Aqua markers, I HIGHLY suggest them. You won't regret it!

SUPPLIES USED:

Wednesday, February 17, 2016

Beautiful Wintery Wishes

Good morning! I have a pretty winter card up today that I created. Just something to send to cheer someone up this winter. Trust me, sometimes all this wintery weather makes for dreary days, so if I can make someone smile with a handmade card during that time, that's wonderful! Makes me warm inside knowing I did.

Okay, I know, I LOVE Bebunni. I can't help it. The images are fun to color, he's sweet as can be, and you can really use them for any occasion! There are a ton to choose from. I try to stretch my stamps though and not use holiday ones just for the holiday, but for other uses. Such as this card I've made today. It's from the Christmas Collection, but paired with another sentiment, it changes the feel of the card completely. That's the beauty of creating your own cards.


For this card, I used a soft blue card base and scored/folded to 4.25x5.5. I inked up the two snowflakes from Stamp-It Australia Twinkle, Falling Snowflake, with Memento Luxe ink in Wedding Dress and stamped that all over the blue paper. 

I stamped the main Bebunni Christmas Collection, Snowy Hugs image onto the Ultra Smooth Premium White Cardstock and trimmed it down to an almost square shape and rounded the 4 corners. I colored it in with my Spectrum Noir Markers (colors listed at the end of the post) and added some sparkle, which is so hard to capture on camera, to the bunny's coat, snowman and the light blue snow underneath them just above the sentiment. I used the Spectrum Noir Sparkle Pens for those elements. 

The sentiment is from the Bebunni Floral Collection, Bloom & Grow. See how it changes the feel of the card from a Christmas theme to just a little pick me up type of greeting? 


I added a thick white satin ribbon at the bottom for fun and clipped the ends. 

Check out all the amazing Bebunni collections over at Crafter's Companion. And of course all the other stamps they carry as well! I'm just partial to Bebunni ;)  

SUPPLIES USED:

Saturday, April 25, 2015

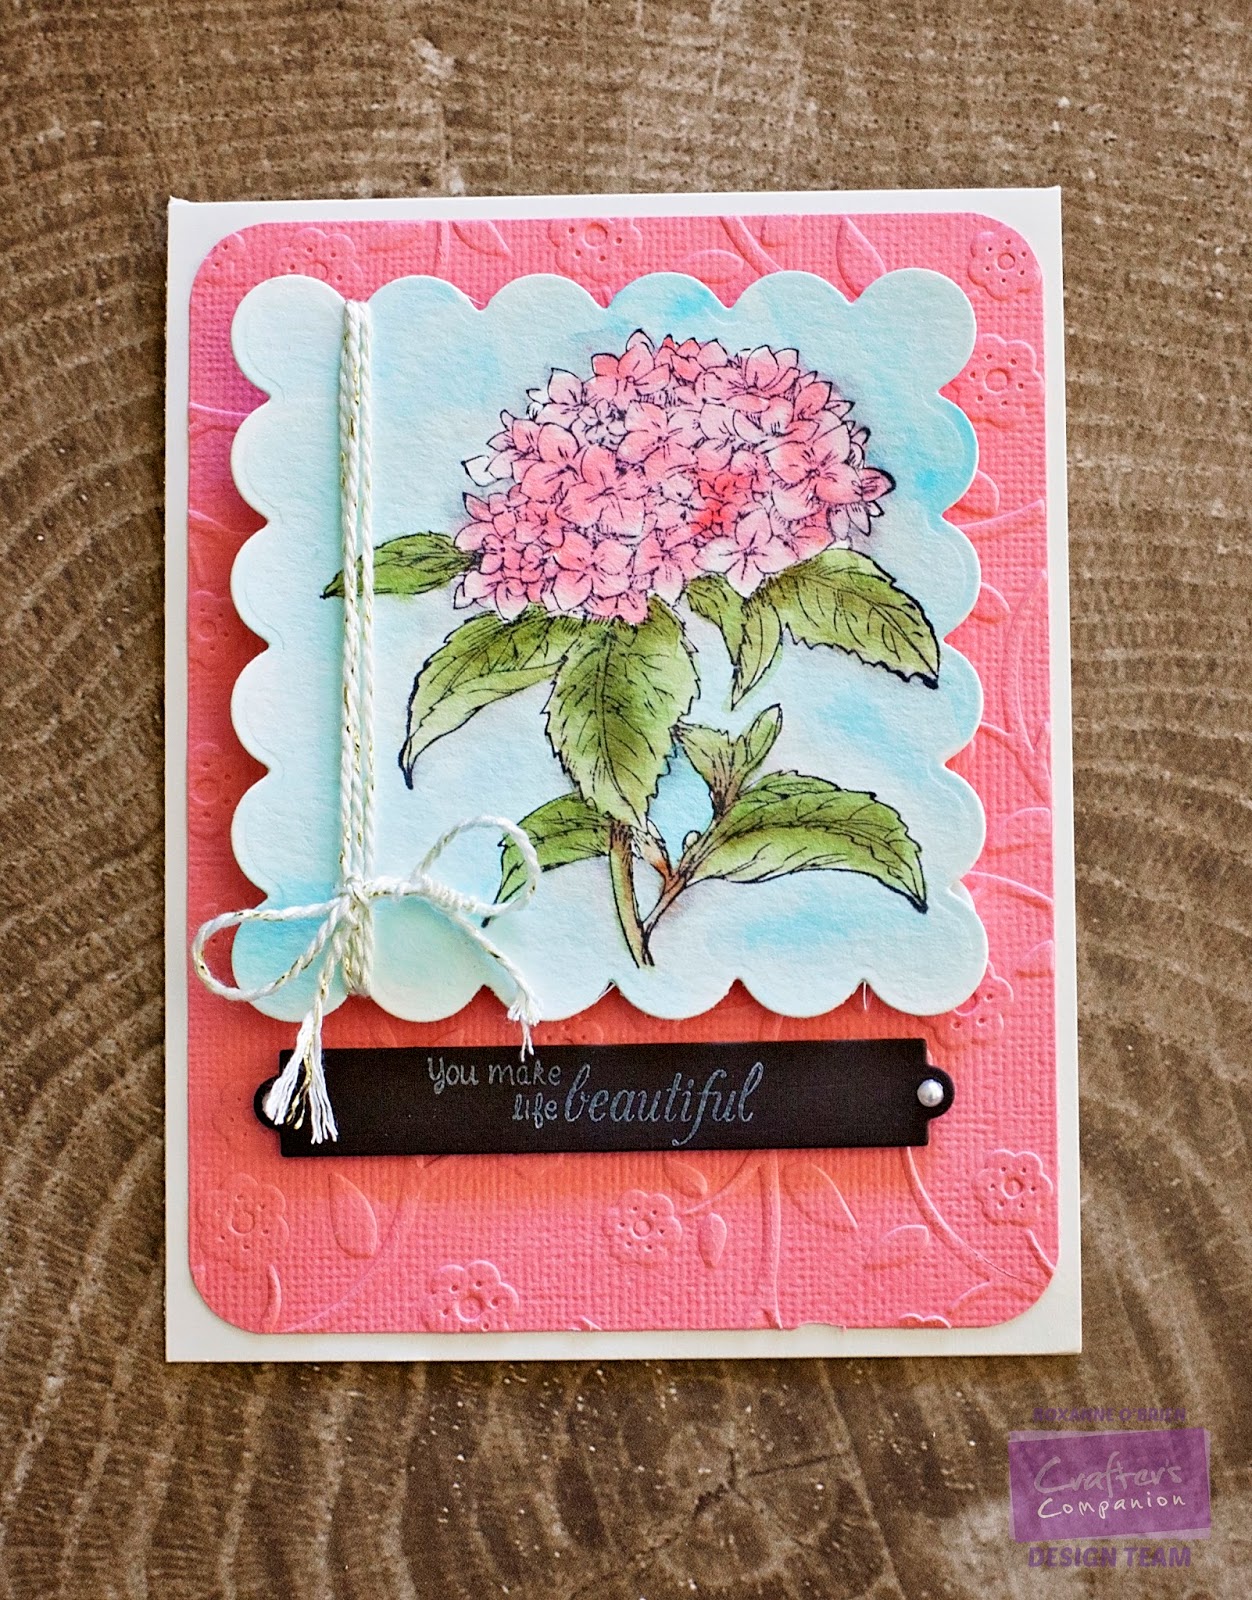
Beautiful Hydrangeas


Nothing says spring like flowers to me. I chose the hydrangea image from the Stamp-It Australia, Floral Fancies set. I diecut the watercolor paper using my Die'Sire Essentials, Scalloped Squares die (the largest one) and stamped the image onto it, moving it flush right, with Memento, Tuxedo Black. I then colored it in using Spectrum Aqua Watercolor Markers in Aquamarine (background), Moss, Leaf Green, Chocolate, Blossom, Begonia and Slate (shadowing). 


I used some pretty white/gold twine in my stash and tied it around the left side of the diecut square.
For the pink background, I used a color that coordinated with the hydrangeas I colored, and used the Flowers & Vines embossing folder. I then rounded the corners and adhered to my card base. I then used foam adhesive to glue the hydrangea square to the pink embossed background. 


The sentiment is from the Bebunni Floral Collection, Flower Garden. It's just a pretty and soft font! I used Memento Luxe in Wedding Dress to stamp it onto the diecut banner piece. I used simple white pearls on the ends to dress it up. 

I hope you enjoyed this card! This would be perfect for Mother's Day coming up. Click on over to Crafter's Companion to see all the beautiful sets you can use to create your Mother's Day card and gifts!

Saturday, April 18, 2015

Hello Hibiscus


Hello! I have a fun and bright card to share today. I have stepped out how I created this below along with links to each supply I used from Crafter's Companion


1. Cut/score orange cardstock base to 4.25x5.5. 

2. Cut small strips of Shimmering Cardstock in Green Envy. Set aside. 

3. Cut sheet for watercolor images. I wanted to create my own patterned paper with this card using a lot of color, so I stamped the small hibiscus image from the Stamp-It Australia, Floral Fancies set with Memento, Tuxedo Black. I used Spectrum Aqua Watercolor Markers to color them in. I referenced images on Google for different colors these gorgeous flowers. I used Yellow, Sunset, Spice, Gold, Amber, Orchid, Heather, Wildflower, Begonia, Blossom, Orange, Rose, Pink, Crimson, Burgundy, Scarlet and Red Violet. To make it look like a true patterned paper, I used Sea Green to color in around the flowers. I love the way this came out, so I'll be doing this technique way more often! 

4. To make a soft sentiment focal point on this bright and busy background, I used a small piece of vellum and diecut it using the Die'Sire Essentials, Rectangles and I embossed it using the top of the Embossing Folder, Christmas Elegance. I used the extra strong permanent tape runner behind where I glued the sentiment to hide it.

5. I then used some little enamel dots for interest on the sheer piece. 

6. I assembled it all and there you go!


Lawn Fawnatics Challenge #8: Summertime Fun

  It's challenge time over at Lawn Fawnatics! This is challenge #8 which is summertime fun.  I mean, we are in the thick of summe...