Showing posts with label Bebunni. Show all posts

Tuesday, February 28, 2017

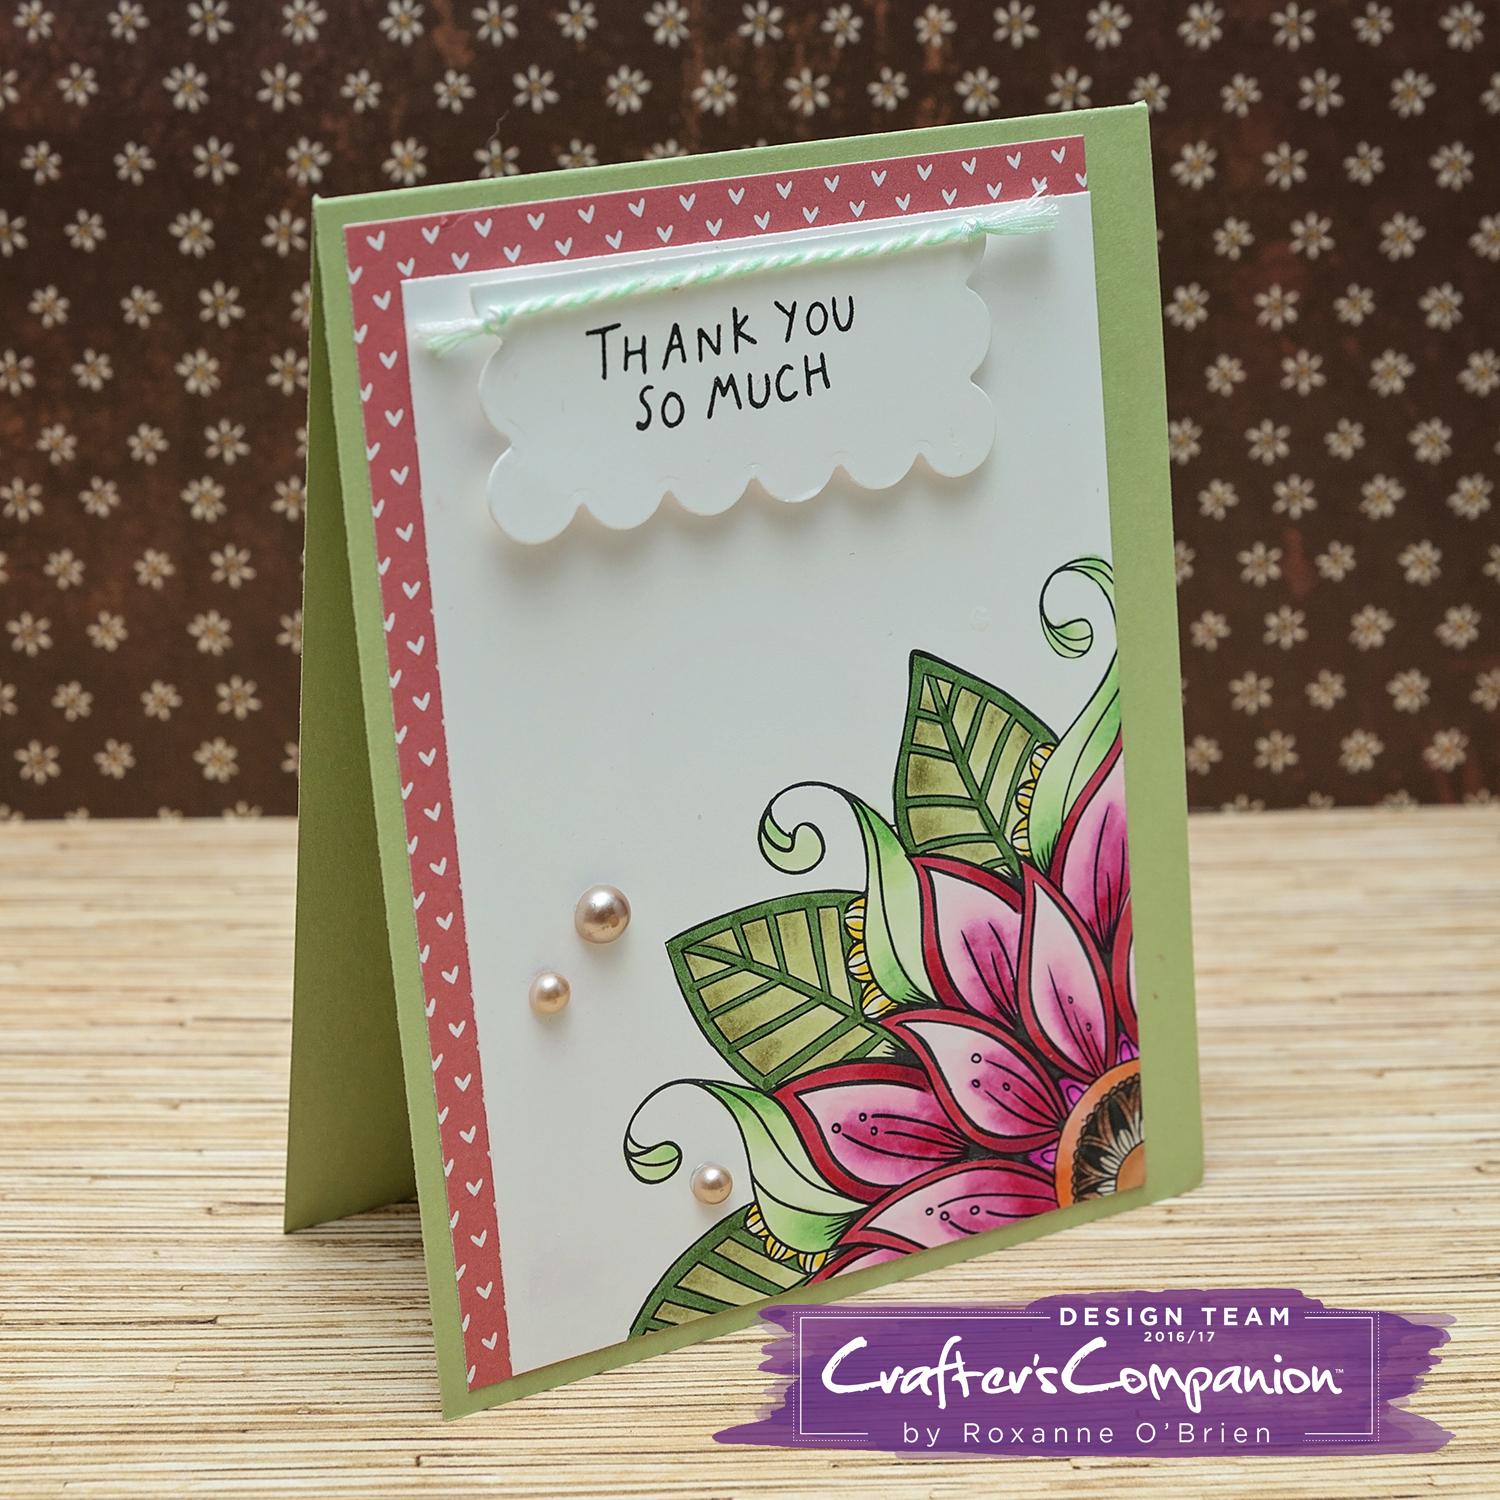
Sweet Thoughts Card


Spring is just around the corner, and you can almost smell those flowers. Okay, I'm dreaming, but this card is too cute for words.


I used the Spectrum Noir ColourBlend Pencils to color this sweet image in. I like how you can see the texture I was able to create on the flower petals with coloring. The shadows underneath are easily achieved with a light hand and some blending solution and blending stumps.


Visit Crafter's Companion to see more projects by our amazing design team.

SUPPLIES USED:


Bebunni Floral Collection, Sweet Friend
Ultra Smooth Premium White Cardstock
Spectrum Noir ColourBlend Artist's Coloring Pencils: Linen, Peach, Pistachio, Sage, Black, White, Denim Blue, Smoke, Pewter, Vivid Pink, Pink Violet, Mulberry
Spectrum Noir Blending Solution
Spectrum Noir Paper Stumps
Memento Luxe Ink, Wedding Dress
Memento Ink, Tuxedo Black

Wednesday, January 25, 2017

Smile It's Your Birthday Cake

Good morning! You can never have enough birthday cards on hand I don't think. These are ones I really try to make every month I craft and as you can imagine, I have a great stash of these already. 

So if you're ever wondering what kinds of cards are great to have on hand, here's a small list:
  1. Birthday
  2. Anniversary
  3. Sympathy
  4. Get Well
  5. Congraulations
  6. Thank you
That's just a start if you're stumped on what types of cards to create to have on hand. I hope that helps you when you sit down to create next time. 


The card I created today used my beloved Bebunni inside a piece of cake! How adorable is he? I simply love these images. I used colored pencils today to give him some life and I just love how realistic you can get with the shading in a soft looking manner. The Spectrum Noir Colored Pencils are just amazing for coloring these in. 


Take a hop on over to Crafter's Companion to check out the coloring options today. 

   S U P P L I E S  U S E D   

Friday, January 20, 2017

Colorista Thank You Card

Morning, everyone. Hope everyone's day has started off nicely. Today I have a very simple card with a lot of punch by simply coloring a bold image. A tip here is to color your images ahead of time and keep them on hand so that you can whip up a card or gift tag in no time at all. I usually color these when I'm at my oldest's Boy Scout meetings. While he's doing his thing, I sit at the table and color. I usually have a lot of the moms there ask what I'm doing and I'm happy to share what products I'm using. I hope to inspire others to sit down, color, and create something with them.


Visit the Crafter's Companion site and blog for more inspiration and to look around to shop


   S U P P L I E S   U S E D   

Thursday, December 1, 2016

It's The Most Wonderful Time of the Year

 It's the most wonderful time of the year! It's going to be a month of many cards from me, so be prepared to see a lot of holiday themed cards. I've been busy making them so I have enough to send out to my photography clients and friends and family. ENJOY!! 


I hope you liked my little Bebunni card I made for sending out. Are you crafting for the holiday season? Check out all the products Crafter's Companion carries. Happy crafting!

Supplies Used:


Thursday, June 30, 2016

My Heart Belongs to Bebunni

We all know I couldn't go a month without making a card using Bebunni, right?! I just adore him. So, here's a little card to simply say I love you...


I used the no line watercolor technique which is so much fun to color. I did realize I need to grab a greyish Distress Ink for this guy. But I think he's still adorable. Watercolor is just so much fun, and so pretty to me. It's also very relaxing to color with my Spectrum Aqua Watercolor Markers!


I hope you liked my simple card today and you're inspired to hop on over to Crafter's Companion and check out the wonderful watercolor products. 

SUPPLIES USED:
Bebunni, Hearts
Floral Delight, Ornate Trellis Die
Spectrum Aqua Watercolor Cardstock
Spectrum Aqua Markers: Peach, Spice, Teal, Charcoal, Red Violet, Chocolate, Slate, Magenta, Blossom, Gold
Memento Ink, Tuxedo Black
Memento Luxe Ink, Angel Pink
Distress Ink, Old Paper


Tuesday, April 26, 2016

Birthday Bebunni & Sequins


Hi there! I have a fun birthday card up today. These simple cards are perfect for giving to kiddos you know and love. They love bright colors and knowing that YOU colored it just for them makes it extra special. And who can resist sequins?! 


I used the Bebunni Hip Hip Hooray set. I stamped it onto Ultra Smooth Premium White Yardstick and colored in everything but the letters (BIRTHDAY) with my Spectrum Noir Alcohol Markers. The BIRTHDAY letters I colored in using the Spectrum Noir Sparkle Pens. All colors are listed at the end of the post. 

I love the Sparkle Pens because on an angle, they're super sparkly and perfect for birthday cards! 


I created a little window to put the Bebunni image into and then glued sequins all over to give it some more sparkle and interest.

I hope you enjoyed my bright and cheery birthday card today. Check out Crafter's Companion site for more inspiration and amazing products for all your crafting needs.


PRODUCTS USED:


Thursday, March 31, 2016

Clean and Simple Lily Card

This is one of absolutely favorite flowers. They're just gorgeous and colorful, coming in all different colors, and delicate. They're stunning. So I love to color this set for various cards. This one can be for any occasion or any celebration! Gotta love cards in your stash like that.

I used the large lily from the Sheena A Little Bit Floral, Lily set and inked it up with Memento in Tuxedo Black and stamped it onto the Ultra Smooth Premium White Cardstock. After I did that, I colored it and the leaves in with my Spectrum Noir Markers. A tip for anyone - if you're unsure of coloring/palettes to use for things like flowers, just Google the image you want to see examples for and you can then color it true-to-life.


For the strip behind the flower, I used the burlap patterned stamp from the Textures, Basket and Burlap stamp set. I simply stamped it with Memento Luxe in Rich Cocoa on some simple patterned paper. Great way to use your scraps and customize them. 


I glued the strip down to a white cardstock base that I cut, scored and folded to 4.25x5.5. I used foam adhesive for the lily and leaves and stamped the sentiment onto the base with Versafine in Onyx Black. I always like to add a fun little touch especially to CAS (clean and simple) cards. I colored some self-adhesive pearls with True Black (Spectrum Noir Marker) and let that dry and then applied them. 


There are a lot of various flowery stamp sets over at Crafter's Companion that are so beautiful and fun to color and use for all your projects. Especially with Mother's Day coming up. Happy crafting.


PRODUCTS USED:

Saturday, March 12, 2016

Birthday Balloons

Good morning, everyone! I hope your start to the weekend is going well. I want to start off this month's projects with a bright and cheerful birthday card. My stash was dwindling so when that happens, I try to create cards to fill that gap. For me, I'm low on birthday cards.

Today, I used the birthday balloons from the Bebunni Celebration set as my main focal point. But to start this card off, I pulled in a color palette that I love!


I took a piece of the Shimmering Cardstock in Coastal Pearl and ran it through my machine using the Embossalicious Birthday Text embossing folder. You only see a peek of that behind the watercolored panel, but it adds a nice pretty color and texture.


For the watercolor panel, I used a piece of Spectrum Aqua Watercolor Cardstock and blended Distress Inks in Dusty Concord, Spicy Marmalade, Tumbled Glass and Scattered Straw. I used sponges to blend this. After I blended it to my liking, I flicked on some water and let that dry. Since Distress Inks react with water, it leaves a really pretty look when it's all dry!

I then stamped the birthday balloons with Versafine in Onyx Black onto the watercolored panel. I stamped a second set of balloons onto the Watercolor Cardstock and colored them in with Spectrum Aqua Markers (all products listed and linked below) to color them in. Such a fun way to bring in a lot of color fairly easily and quickly. After they dried, I fussy cut them out and adhered them right over the first group of balloons I stamped with some foam adhesive. Gives great dimension to your projects!


For the sentiment, I simply took a strip of the Watercolor Cardstock and stamped the two sentiments from the Bebunni Celebration set and stamped them next to each other and glued that strip to the bottom of the watercolored panel.


I encourage you to check out all the wonderful watercoloring items over at Crafter's Companion. It's such a beautiful way to add gorgeous results to all your projects. Happy crafting!

PRODUCTS USED:

Saturday, February 27, 2016

Take Time Card


Happy Saturday everyone! Today's card is a quick and pretty springtime card I created using another Bebunni set! It's the perfect time of year for bunnies, anyway...

On to my card.


Doesn't this make you want springtime to just get here?? I just love it! And the sentiment is something I think we can all live by. 

I diecut a simple tag shape out of watercolour cardstock, stamped the Bebunni image onto it with Versafine in Onyx Black. I colored him in with my Spectrum Aqua Markers and water brush pen. I punched a hole in the center of the tag at the top and tied a charcoal color piece of twine through it. 

I used a simple white cardstock base trimmed, scored and folded to 4.25x5.5. I chose a pretty piece of patterned paper to use and glued that down to the center of the base. For some interest, I embossed a piece of smaller vellum and then glued everything down. I added the row of pearls at the bottom for that feminine touch. 


Grab all your crafting needs at Crafter's Companion!! Perfect for building up your stash of cards to have on hand to send whenever you need a card. Handmade is best! 

SUPPLIES USED:

Saturday, February 20, 2016

No-Line Watercoloring Best Wishes Card

Happy Saturday! I have one of my favorite techniques up on my card for today - no line watercoloring. One of these days I'll attempt to create a video for you. ;)


I know you're surprised...it's Bebunni!! Come on though. How can you NOT love him?! 

I inked up the image from the Bebunni Close To Your Heart, Special Friend stamp set with Distress Ink in Old Paper and stamped him onto the watercolour cardstock. For this technique, you'll want a very subtle color to stamp your images with so you get the effect of no-line drawings and simply the watercolor. After I stamped it, I rounded the bottom corners and started to watercolor. I used my Spectrum Aqua Markers for this with a water brush pen and colored away. For the details like the nose, whishers, etc. I used a thin black Micron pen and traced over the lines. 


The sentiment was stamped with Versafine in Onyx Black so that when I colored over it with that pretty yellow watercolor, it didn't bleed. I trimmed it out pretty close to the wording and set it aside.

My card base is a simple white cardstock that I cut, scored and folded to 4.25x5.5. I rounded the bottom corners and then adhered my colored Bebunni panel to the base. 

Since the top of the card needed something colorful and fun, I used two patterned papers from my stash and diecut two of the buntings out using my Die'Sire Traditional Bunting die. I adhered them with some foam adhesive. Just the right touch! 


I glued the sentiment in that open space just under the bunting on the right side, and that is all! Very cool technique. I encourage you to try it. It's addicting. Visit Crafter's Companion and if you haven't purchased any of the Spectrum Aqua markers, I HIGHLY suggest them. You won't regret it!

SUPPLIES USED:

Wednesday, February 17, 2016

Beautiful Wintery Wishes

Good morning! I have a pretty winter card up today that I created. Just something to send to cheer someone up this winter. Trust me, sometimes all this wintery weather makes for dreary days, so if I can make someone smile with a handmade card during that time, that's wonderful! Makes me warm inside knowing I did.

Okay, I know, I LOVE Bebunni. I can't help it. The images are fun to color, he's sweet as can be, and you can really use them for any occasion! There are a ton to choose from. I try to stretch my stamps though and not use holiday ones just for the holiday, but for other uses. Such as this card I've made today. It's from the Christmas Collection, but paired with another sentiment, it changes the feel of the card completely. That's the beauty of creating your own cards.


For this card, I used a soft blue card base and scored/folded to 4.25x5.5. I inked up the two snowflakes from Stamp-It Australia Twinkle, Falling Snowflake, with Memento Luxe ink in Wedding Dress and stamped that all over the blue paper. 

I stamped the main Bebunni Christmas Collection, Snowy Hugs image onto the Ultra Smooth Premium White Cardstock and trimmed it down to an almost square shape and rounded the 4 corners. I colored it in with my Spectrum Noir Markers (colors listed at the end of the post) and added some sparkle, which is so hard to capture on camera, to the bunny's coat, snowman and the light blue snow underneath them just above the sentiment. I used the Spectrum Noir Sparkle Pens for those elements. 

The sentiment is from the Bebunni Floral Collection, Bloom & Grow. See how it changes the feel of the card from a Christmas theme to just a little pick me up type of greeting? 


I added a thick white satin ribbon at the bottom for fun and clipped the ends. 

Check out all the amazing Bebunni collections over at Crafter's Companion. And of course all the other stamps they carry as well! I'm just partial to Bebunni ;)  

SUPPLIES USED:

Saturday, December 12, 2015

Sent With Love

Good morning! I have a great new technique up on today's card to share with you. My bestie uses this all the time and encouraged me to try it out. And I must say, I love it! It's the no line watercolor technique. Basically you stamp your image with a faint ink so that it doesn't really show up predominately and then watercolor your image. It's gorgeous! You'll be seeing this technique show up a lot more often now that I've tried it and I love it.


We all know the love I have for Bebunni anyway, but this technique just made me love him even more!!! It really adds a depth to the image that I love. 

He's just too darn cute!


I figured it's about time to start making a few Valentine's day cards for my loved ones, right?! 


I used my Spectrum Noir Sparkle Pens again on this card, but you can't really see the effect all that well, but I assure you, the glittery awesomeness is there! 

I hope you're inspired to try out this technique with a stamp designed just for coloring from Crafter's Companion.


SUPPLIES USED


Wednesday, July 29, 2015

Christmas in July

Ho ho ho...wait...Christmas in July everyone! Don't worry, we have 169 more days until then. Sounds far away, right?? Well I like to sneak in holiday cards here and there so it's not so overwhelming when the actual holiday time rolls around. This way, you can do fun things like bake cookies and make gifts, or watch holiday movies! And when you need a card, just grab and go. :)

Here is my Christmas card I have created for today:


It's no secret Bebunni is one of my favorite images to color, so naturally, I grabbed him when I thought of making a holiday card. I used the Bebunni, Rudolph set. I inked him up with my Memento, Tuxedo Black and stamped onto a piece of the Ultra Smooth White Premium Cardstock. I grabbed my Spectrum Noir Blendable Colored Pencils this time to color. I haven't colored with them in a while, so it was nice to get back to using them. I missed them! I used 092, 094, 035, 034, 009, 114, 116, 084, 089, 119, 065, 067, 044, 043, 061 and 063. I blended the colors with the Blending Solution and Paper Stumps. For the shadow under his feet, I did use my Spectrum Noir Markers in BGR1 and the Blender. I also went over that with my Wink of Stella brush pen to give it a bit of shimmer (hard to pick up in the photograph) to mimic snow. 

For the snowflakes around him, I used the snowflake stamps in the Rudolph set and used Memento in Summer Sky to add them in. They're nice a soft and subtle. 

The sentiment is also from the same set and I used Memento in Nautical Blue on a piece of blue cardstock. I cut that out with the Die'Sire Essentials, Circles dies. I added a fun pearl to the dot of the "i" in Jingle. 


It's hard to see in the photo because the cardstock is really dark blue, but I did use the Christmas Patchwork embossing folder on the darkest piece behind the colored image. I love how embossing adds a nice textural element to your projects.

I hope you are inspired to at least sneak in a project here and there this summer to have on hand for the holiday season. It will be here before we know it! Check out all the amazing holiday products you can use at Crafter's Companion

Lawn Fawnatics Challenge #8: Summertime Fun

  It's challenge time over at Lawn Fawnatics! This is challenge #8 which is summertime fun.  I mean, we are in the thick of summe...