Wednesday, January 22, 2014

Fabulous Beach


In the middle of winter, I love to think of going to visit a beach! :) Yea, it's torturous, but they're so serene and pretty. My card today I think is very reminiscent of that thought.


This would be a great card to mail to anyone who may need a little pick me up or even a birthday. The main beach image is from the from the Sheena's A Little Bit Scenic-Seascapes. I made my own sky and sand using my Spectrum Noir markers in BT1 (sky) and EB1 (sand). I then colored the flowers and grass with DG1, DG2, DG3, BG1, LY1, and GB2. To give the sky and sand some dimension, I went in with a craft sponge and my Distress Ink in Iced Spruce and dabbed on darker areas for the sky. For the sand, I used Distress Ink in Old Paper and did the same thing. 

After I stamped the sentiment from Sentimentals-Imagine set, I spritzed on Fireworks Spray in Desert Sand to give it a shimmer. I took a photo on an angle and darkened it up a little to show that (it's hard to capture!). Thanks for stopping by!


Wednesday, January 15, 2014

You're Super Swell!


I adored this sentiment on the sticker I used for this card. You're Super Swell! :D It's just too cute. I decided to pair that with the Mulberry Wood, Love You set. I colored them in with my Spectrum Noir markers (Blender, HB1, HB2, DR1, DR5, LG2, LG5, CR1, CR6, PL1, PL2, GB2, GB5, BP2, BP5, FS8, IG1, IG4, IG6, FS2, CG2, BT1).


I then glued my colored image to a tag from the Large Tag Package. I love these tags!! I had a little space left on the left and right of my tag where my image didn't fit, so I took coordinating patterned paper strips (GREAT way to use your scraps!) and filled in that white space with that. I just punched through the hole that's already in the tag and added a fun brad. You could use ribbon or twine as well!


I adhered the tag onto the card base with foam square adhesive from Crafter's Companion. I used a pretty striped light aqua patterned paper, rounded the corners for fun, and stuck that over my sticker sentiment. Easy card with a punch of color to cheer up anyone's day!

Thanks for stopping by!

Tuesday, January 14, 2014

Lawnscaping Challenge No. 73

Good morning! I've got a card I'm sharing with you today that I made for the Lawnscapings Challenge. The challenge this time is Let's Party, It's Our Birthday! I always like to have a bunch of birthday cards on hand. It's great to just dig through what I have before a party or to mail out to brighten someone's day. I'll admit, I'm not the best at remembering to stick one in the mail...guilty.

I decided to pull the colors from the inspiration photo from the challenge as you can see in the photo to the right. I also pulled the circle shapes in as well.

I used the dots from the Lawn Fawn Trim the Tree set. They're perfect for a pretty confetti sky like I created here! I used the dots with Memento Luxe, Grey Flannel, VersaMagic, Thatched Straw, Stampin' Up, Baja Breeze, and Memento, Rose Bud. For the ones I stamped in Rose Bud, the color is pretty intense, and I wanted something softer to match my patterned paper at the bottom, so I just stamped it off on another sheet of card stock before stamping onto the card piece. It was a random stamping I did, nothing precise or planned out!


For the presents, I chose the gifts also front the Lawn Fawn Trim the Tree set. I stamped the row of presents on my card piece, and then stamped them again on various patterned paper to match the dots I stamped. I trimmed them out and used foam circles behind them to pop them up off the card.

The sentiment is from Lawn Fawn's Trim the Tree set (happy) and Milo's ABCs (birthday). I stamped those with Memento, Tuxedo Black. I stuck on a cute little black and white twine bow next the sentiment. The little hearts are also from the Milo's ABCs set.

And that's my Happy Birthday card. I hope you liked it! The sponsor this time is Simon Says Stamp and they rock! :D I had to enter. Have a wonderful day!!


Wednesday, January 8, 2014

Thank You So Very Much!


BRRRRR. What else can I do on a cold day other than craft?? :) It's been astoundingly cold here near Chicago. My kids have been off of school Monday and Tuesday to the severe cold we are experiencing. So, let's warm up with a warm and inviting card, huh?


I started with my Sheena's Floral Fantasy, Wild Rose & Hibiscus set and Memento Tuxedo Black Ink. Stamped onto the Crafter's Companion Ultra Smooth Premium White Cardstock. I colored these in with my Spectrum Noir markers (SN: CG1, CG3, CG4, IG1, GB4, GB7, CR3, CR6, CR7, and CR8).

I then fussy cut around them. I chose some coordinating papers I had in my stash as a portion of a doily. The sentiment is actually a sticker! I just kind of arranged things as I liked them and glued down the flower and leaves with the Crafter's Companion adhesive foam squares for dimension.

My kids were crafting alongside me while I made this and were using some glitter glue. So, I snagged the gold glitter glue and added a little sparkle to the center of the flower! :) They use my things, so I use theirs!


Did you notice I finally have a watermark?? I love it! What do you think?

Friday, January 3, 2014

Valentine Treat Bag


I've got an ADORABLE little treat bag perfect for your kids on Valentine's Day morning or what a sweet thing to leave on your co-workers desk!

I finally used my Ulti-Bags Ultimate Embossing Board with my Ultimate Tool. I did watch some of the Crafter's Companion YouTube videos out there, and they do a great job explaining how to use these wonderful embossing boards! 


Here are step by step instructions to making this treat bag:

1. What you do is put your board onto your Ultimate Tool and give a few quick sprays with the Crafter's Companion Stick & Spray Repositionable Adhesive on the actual embossing board.

2. Put your patterned paper with the side down you want on the outside of your bag (I chose the arrow pattern to be on the outside of my bag; it's light pink on the inside).

3. I used the stylus tool included with the Ultimate Tool to run along the indentations of the embossing board, lifting up the paper as I go to see where to place the tool. It makes more sense once you actually do it! But you want to use a gentle touch with darker colored paper as it will crack and you'll see it more.

4. Once you're all done embossing your card stock, take it off your embossing board. There will be residue left from the Stick & Spray adhesive. You'll want to take your Crafter's Companion Stick Away Adhesive Remover and a paper towel and it will come off. Great products, ladies!

5. After removing your card stock, you'll see the embossed area. Take note of what areas to cut around and what areas to fold. For this one, I had to cut out around the outer edge of the bag and the center half moon shape for the handle. The rest were marks that I scored to fold on to make the bag. 

6. I then folded all the appropriate scores and used the Crafter's Companion Extra Strong Tape Runner to glue the sides of the box to hold it together. Your bag is complete!! Now, you can of course embellish or make panels for your bag with the other parts of the embossing board. You can see in THIS IMAGE that there are a lot of panels you can create for your bags!

7. I chose to make this little adorable guy into a brown bunny. I seriously adore these images!!! This guy is from the Bebunni-Sent With Love set. I stamped him with my Memento Tuxedo Black onto the Crafter's Companion Ultra Smooth Premium Cardstock. I colored him in with my Spectrum Noir markers (TN1, TN2, TN3, TN4, TN8, PP5, HB1, HB2, CR2, CR3, IG1, BT1, and DR2). I then fussy cut him out and used a simple wood veneer heart (colored in with DR2) and used foam adhesive squares to stick him onto the bag. 

8. I covered some simple chipboard letters in X and O with a coordinating paper and snuck those in behind this guy. 


There's a great little treat bag great for things like conversation hearts, Hershey kisses or M&M's or even little things like small pencils, bubble wands and paper pads, crayons, small PlayDoh...the list can go on. If you don't have the Ultimate Tool or embossing boards, grab them! 

Thursday, January 2, 2014

Life is Good


Here's a bright card that I created while watching the snow fall. I wanted something bright and cheery! I chose the Party Paws-Bamboo set. He's this adorable little panda holding a giant flower and butterfly. I stamped him with my Memento Tuxedo Black onto the Ultra Smooth Premium White Cardstock sold by Crafter's Companion. I will tell you it makes a HUGE difference when coloring!! The colors do not bleed at all. You can see that by the dark grey I used on the bear. Nothing bleeds at all. I wouldn't use anything else when I color.


I colored him in using my Spectrum Noir markers (Blender, PL1, PL2, PL3, JG7, LG5, OR1, OR3, IG10, IG2, IG1, FS2, PP1, CT1, CT2, CT4 and BT1).  I hope you can see the subtle sky, shadow under his feet and shadowing on his belly/face I did with the IG1 marker. Gives a ton of dimension to your images.


I stuck him behind this little Polaroid type frame I had with a perfect sentiment snuck in there...Life is Good. I chose a coordinating patterned paper, a little sewn embellishment at the top and glued to my kraft base. Fun and cheery card for any occasion. Hope you enjoyed my project.

Wednesday, January 1, 2014

Happy New Year!

Happy New Year! I can't believe 2013 has come and gone (good riddance for many reasons!) and 2014 is upon us. With my son's birthday party, his actual birthday, and many Christmas celebrations, I'm starting 2014 a bit behind on my crafty projects. So, I'll be posting several projects over the next couple of days to catch up.


My first project is a pretty little card that can be sent to a friend to simply put a smile on their face! I used the Stamp-It Australia, Ornate Accessories for this card design along with Distress Inks in Tea Dye and Old Paper. I stamped them onto kraft paper. I also used Memento Tuxedo Black and Memento Luxe in Grey Flannel. I wanted it to have a worn, comfortable look. I also used my Dew Drop in Cosmic Copper (for the ornate circular frame and the text block). When turned in the light, it gives a slight sheen. I also spritzed on a few bursts with the Memento Fireworks spray in Desert Sand. Next time, I'll use even more!!


I then distressed the edge of the kraft piece, stamped onto my tag and used a yellow brad for a pop of color in the punched hole of the tag. I adhered that with foam adhesive to the stamped background and then used foam adhesive on the back of that to adhere to my pretty watercolored patterned paper I chose. You can just see a peek of it, but it's really very pretty. Thanks for stopping by!


Saturday, December 21, 2013

Santa Bear


I have another Christmas card I have created. I'm using these as my cards for family members and friends so that everyone gets a unique to them card. Plus, I get to give away these cards I'm creating and let people enjoy a handmade card from us this year. Photo cards just never happened. Hey, when you're a photographer, your family is the LAST to get photographed. Well, there's always next year, right??


I've got an adorable bear dressed as Santa from the Popcorn the Bear, Santa Bear stamp set from Crafter's Companion. He's a bigger stamp, which I love because then he becomes the focal point! I stamped him with Memento Tuxedo Black on white card stock. I colored him in with Spectrum Noir markers (TN1, TN2, TN3, TN5, TN7, IG3, IB1, DR1, DR5, DR6 and Blender).

I ran my patterned card stock from my stash through my Cuttlebug using my Darice Harlequin Embossing Folder from Crafter's Companion. It adds just a little bit of texture to the card.


I added a snowflake, small rhinestones to the edges, and a simple sentiment in the center from the Sentimentals, Christmas Magic set. I stamped it in white ink on a piece of red card stock from my stash. I freehand cut the edges to give it some interest. I adhered that and the snowflake with the Crafter's Companion square foam adhesive. LOVE those.


There you go! Hope you enjoyed my little Santa bear card. Thanks for stopping by.

Wednesday, December 18, 2013

Crafter's Companion Monthly Challenge


Happy hump day! I've got a fun challenge for you to participate in and make it over that hump in the week to the weekend of what I'm sure is packed full of holiday festivities.

Join the Crafter's Companion monthly challenge for December with the theme of RIBBONS/TWINE! I chose to use the Stamp-It Australia Twinkle sets for this project. I used the Christmas Happiness and Believe for this card. I inked them up with Memento Tuxedo Black and stamped them on my kraft piece.


I then took the snowflake images from the Believe set and inked those up with my Distress ink, Tea Dye and stamped them here and there. I wanted them to be pretty faint, but fill in the open space!

After I stamped it, I then colored in the holly leaves with my Spectrum Noir markers (CG1, CG2, CG4) just to give it a little color.

After that, I rubbed some of my Delicata, Golden Glitz ink here and there on the card to give it a sheen when you turn it in the light. See the photo below (hopefully you can see the little bit of shimmer). Adds just a little gentle sparkle. Dab it on your finger and just kind of swipe it across the area you'd like.


For the little bits that look like snow, I used my white spray mist and flicked on the color.

Once dry, I glued on my pretty aqua ribbon/trim at the top. I then took another piece of this awesome red fiber I had in my stash for a loooong time and wrapped that around the top. I taped it onto the back; you'll never see it! I then glued my kraft piece to my white card base and there you go! Vintage Christmas card DONE!


I hope you play along with us this month. Pop on over to the blog to enter! Read all the rules and details there as well. You have until

Friday, December 13, 2013

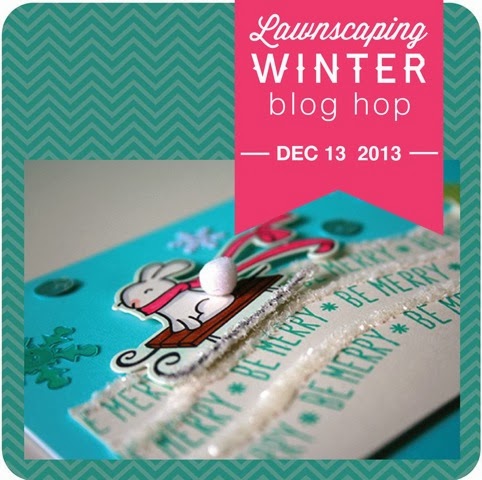
Lawnscaping Winter Blog Hop 2013


Welcome to the Lawnscaping Winter Blog Hop! I'm very excited to be participating in this hop :) As you can see from the image above, the theme for the hop is WINTER!! What better timing, right? For my project, I chose to make a Christmas banner for my china cabinet. I had purchased this simple banner kit this past fall on clearance (under $4!) so I couldn't wait to get started with decorating it. 

First, here are the details for this fun filled hop. There will be LOTS of prizes. The specific information about the sponsors and prizes can be found by visiting the Lawnscaping home page. Leave comments on every blog that is participating in the hop for your chance to win. You can leave comments up until Sunday, December 15 at 11:59pm EST. 

You should have arrived from Taylor Usry's blog. Next, you will want to move on to Karin and continue hopping!!! Good luck and enjoy the winter blog hop from Lawnscaping.

And now on to my project...

Here is the banner I created for the winter themed project and then close ups of each pennant to show you the details I used. I have listed the products I used below (some items are from my stash so I don't have those!). Thanks for stopping by and enjoy hopping along!!! Thanks for visiting.


Supplies Used:
KIT-Banner Kit by Canvas Corporation

PAPERS-Teresa Collins, XMas Ads (newspaper print & red and white deer); Little Yellow Bicycle, Christmas Village and Brown/Black Dots; others in my stash

STAMPS: Sweet Stamp Shop, Monogram It; Stampin' Up!, Stitched Stockings; Technique Tuesday, Kids Are Cool by Ali Edwards; Pink Paislee, Sentiment Series; Lawn Fawn, Winter Gifts, Milo's ABCs, Into the Woods, Winter Sparrows.

INKS: Memento, Tuxedo Black; Memento Luxe, Pistachio; Versamagic, Sugarcane; Distress Inks, Old Paper, Iced Spruce, Festive Berries, and Tea Dye.

SPECTRUM NOIR MARKERS: DG2, DG3, DR5, DR7

OTHER: Kaiser Craft, chipboard letters; Maya Road, Snowflake Transparencies; Stampin' Up!, Stitched Stockings Punch; Crafter's Companion, Spray & Sparkle Glitter Varnish-Iridesent; Mister Huey Color Mist, Warm Calico and White. 

ADHESIVE: Crafter's Companion, Foam Squares; Xyron, Mega Runner.

Tuesday, December 10, 2013

CardMaker Magazine Joint Blog Hop


Happy December! Today, I'm participating in the joint blog hop with Crafter's Companion and CardMaker Magazine. I have a cute little Christmas card for you today.


I used a kraft colored card base (yes, I'm slightly obsessed) and some festive green patterned paper from my stash. I then stamped and colored in the image which is from Mulberry Wood-Giving. I love the sweet moose artwork! I used my Spectrum Noir markers (FL3, BT7, PL3, JG5, HB3, OR1, BP5, CR10, DR3, CR3, LG3, LG4, LG5, GB1, GB8, GB9, GB10, TN4, TN7, IG2, IG4, BG2 and Blender). I cut out the image in a rectangle shape and rounded two corners to mimic the corners I rounded on the card base and patterned paper piece. I then distressed the edges to add interest.

The sentiment is from the Stamp-It Twinkle, Believe set. Very simply stamped in black on white cardstock and I cut in a rectangle and distressed the edges as well. I glued that down underneath the moose image. I then added a few clusters of white pearls as well as adding some white spray mist which I unscrew the top and use the actual wand and dotted the mist on over the drawn snowflakes on the stamp.

Here is the list of amazing designers participating in the blog hop:

Roxanne O'Brien <<<YOU ARE HERE!>>>

Please visit all the blogs listed above to see the amazing projects created for this special event and be sure to visit the Crafter's Companion USA Facebook page and fill out the entry form there for your chance to win some AMAZING prizes. 

Two Prize Packs will be given away on the Facebook page.  Each will include a stamp, 2 six-marker sets, an embossing folder & a CardMaker Subscription. 

Have fun hopping around!!! 

Good luck :)

Lawn Fawnatics Challenge #8: Summertime Fun

  It's challenge time over at Lawn Fawnatics! This is challenge #8 which is summertime fun.  I mean, we are in the thick of summe...