Thursday, March 31, 2016

Clean and Simple Lily Card

This is one of absolutely favorite flowers. They're just gorgeous and colorful, coming in all different colors, and delicate. They're stunning. So I love to color this set for various cards. This one can be for any occasion or any celebration! Gotta love cards in your stash like that.

I used the large lily from the Sheena A Little Bit Floral, Lily set and inked it up with Memento in Tuxedo Black and stamped it onto the Ultra Smooth Premium White Cardstock. After I did that, I colored it and the leaves in with my Spectrum Noir Markers. A tip for anyone - if you're unsure of coloring/palettes to use for things like flowers, just Google the image you want to see examples for and you can then color it true-to-life.


For the strip behind the flower, I used the burlap patterned stamp from the Textures, Basket and Burlap stamp set. I simply stamped it with Memento Luxe in Rich Cocoa on some simple patterned paper. Great way to use your scraps and customize them. 


I glued the strip down to a white cardstock base that I cut, scored and folded to 4.25x5.5. I used foam adhesive for the lily and leaves and stamped the sentiment onto the base with Versafine in Onyx Black. I always like to add a fun little touch especially to CAS (clean and simple) cards. I colored some self-adhesive pearls with True Black (Spectrum Noir Marker) and let that dry and then applied them. 


There are a lot of various flowery stamp sets over at Crafter's Companion that are so beautiful and fun to color and use for all your projects. Especially with Mother's Day coming up. Happy crafting.


PRODUCTS USED:

Saturday, March 26, 2016

Butterfly Birthday Greetings

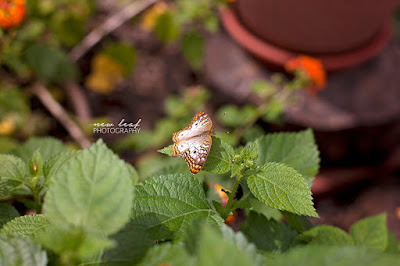
Good morning! Don't you just love butterflies? They're just so colorful and delicate and peaceful to watch flying around. I had the chance last summer to visit the Hershey Gardens over in Hershey, Pennsylvania (sweetest place on Earth!!) and they had a butterfly house that you could go in and see the beautiful butterflies. I was just in awe with these creatures. I'll share some photos at the end of this blog post.


So for today's card, I chose the butterfly from the Sheena A Little Bit Scenic, Flying Colors for this card's focal point. I started with a bold black cardbase which I embossed with the an embossing folder. I found a pretty doily patterned paper for the bottom strip you see on the card. I rounded just the right corner.

The sentiment circle is from the Sentimentals, Imagine set and I diecut a circle out of watercolor cardstock and inked the stamp with Memento Luxe in Angel Pink and part of the left and top with Distress Ink in Dusty Concord. You can ink that with a sponge or just the actual ink pad, just dab it on and blend it. This is a great way to make use of your ink pads and stamps and give it a really unique look.


 For the butterfly, I inked it up and stamped onto the Ultra Smooth Premium White Cardstock and trimmed it out very close to the edge. I colored it in with Spectrum Noir Blendable Colored Pencils (all colors and products listed and linked below) and some of my Sparkle Pens which you can see in person. I then used some Glossy Accents over the wings to make it appear shiny just like a true butterfly's wings are. After that all dried, I adhered the sentiment circle down first and then the butterfly over that with some foam adhesive.


Here are some of the gorgeous butterflies I had the joy of photographing 
last summer at Hershey Gardens. If you're ever in that area, I encourage you to visit there. 
They have the most roses I've ever seen in my life, and they're so gorgeous. 


Please visit Crafter's Companion today to see all the varieties of crafting products used here and so much more! Happy crafting.

PRODUCTS USED:
Crafter's Companion Sentimentals, Imagine
Sheena Flying Colors, A Little Bit Scenic
Memento, Tuxedo Black
Memento Luxe, Angel Pink
Distress Ink, Dusty Concord
Ultra Smooth Premium White Cardstock
Spectrum Aqua Watercolor Cardstock
Embossalicious 6x6 Embossing Folder, Roses
Spectrum Noir Sparkle Pens: Rose Quartz and Crystal Clear
Spectrum Noir Blendable Colored Pencils: 039, 038, 037, 078, 082, 084, and 040
Paper Stumps
Blending Solution
 

Monday, March 21, 2016

Lawnscaping Challenges #126 Sponsored by Lawn Fawn


We are sponsored by the always amazing Lawn Fawn! They are sponsoring this challenge with a free stamp set of the winner's choice!


I decided to go with these adorable popsicles for my "sweets" on this card. Who doesn't love a good popsicle on a summer day?! Or spring! (Hey, I'm realllllly looking forward to spring.)


I couldn't just make one popsicle guy. I made a stack of them! Because really, when it's summer and it's hot, you cannot have just one! (And yes, the two joined together makes ONE popsicle in my book...)

I wanted them to be realistic, so I used my Spectrum Aqua Markers which are amazing to watercolor with for so many reasons. So I stamped a bunch and had fun coloring them different colors that were bright and fun. 


As you can see, I used foam adhesive to pop them up off the card. For the background behind them, I used my Spectrum Noir Sparkle Pens to flick on different colors that coordinated with the popsicle colors I used. You can't see it in the photo, but they're shimmery! So pretty.  


 I put everything onto a black base so that the colors really stand out. I glued a white panel to the interior of the card and actually used another popsicle guy inside as well. That way, you can write your greeting inside with a regular pen! Just a little tip.

I hope you enjoyed my take on the challenge this time, and please check out the Lawnscaping blog for full details to enter your project into the challenge!! Thanks for stopping by! Happy crafting. 


PRODUCTS USED:
  • Lawn Fawn Here's the Scoop
  • Versafine, Onyx Black 
  • Kuretake Water Brush Pen
  • Spectrum Noir Sparklet Pens
  • Spectrum Aqua Markers
  • Spectrum Aqua Watercolor Cardstock

Saturday, March 19, 2016

Watercolor Bunches of Love

I have another bright and cheery card up today for you! The bit of nicer temps inspired me to create these more spring-like cards. I'm definitely anxious for spring. Winter's around here are looooooong, so we embrace the 50 degree days!!


 Of course I grabbed my favorite little buddy, Bebunni, for this card. He's so much fun to color. I stamped him onto watercolor cardstock with Distress Ink in Old Paper to mimic the no-line watercoloring technique. If you haven't tried this, definitely give it a go. You'll be hooked!


I used the Spectrum Aqua Markers to color him in and for the "sky" around him, I used the Spectrum Noir Sparkle Pens. In person, you can definitely see that pretty shimmer that the Sparkle Pens give. It's beautiful. I love that you can use them just as you would the Spectrum Aqua Markers with just a bit of water and a brush.

I assembled the card onto a soft yellow cardbase and I went landscape this time. Most of my cards are portrait style, but this was really cute when I turned it.


I hope you enjoyed seeing what I created with another Bebunni set. Check them all out over at Crafter's Companion. I'm still trying to get them ALL! :) Happy crafting!

PRODUCTS USED:

Wednesday, March 16, 2016

Dowton Abbey HSN Release

Good morning! I know that Downton Abbey has been a very popular show and there are now a LOT of beautiful products available from Crafter's Companion! Check out HSN and see Crafter's Companion's own Sara Davies debuting these products on Wednesday, March 16.

Here is a card that I created with various items from this release. The quote made me actually laugh out loud and I thought how perfect to give to an older friend or family member on their birthday or anniversary? It's so perfect and funny in such an elegant way.


Here are the products I used:
Downton Abbey Die Cut Toppers Set 1
Downton Abbey 6x6 Luxury Paper Pad
Downton Abbey Metal Dies, Half Doily
Downton Abbey, Paper Flowers
Downton Abbey, Pearls, White & Cream
Downton Abbey, Thistle Embossing Folder

Please be sure to tune in to the HSN show featuring Sara Davies and all these wonderful Downton Abbey products and more designs from the design team showcased! Stay connected to details on exact times from the Crafter's Companion Facebook page HERE!  There are also more details for the HSN show information at http://us8.campaign-archive2.com/?u=0e113ea0c2c642690d9a63ea3&id=9385e5ef5d

Thanks for checking out my project and happy crafting!


Saturday, March 12, 2016

Birthday Balloons

Good morning, everyone! I hope your start to the weekend is going well. I want to start off this month's projects with a bright and cheerful birthday card. My stash was dwindling so when that happens, I try to create cards to fill that gap. For me, I'm low on birthday cards.

Today, I used the birthday balloons from the Bebunni Celebration set as my main focal point. But to start this card off, I pulled in a color palette that I love!


I took a piece of the Shimmering Cardstock in Coastal Pearl and ran it through my machine using the Embossalicious Birthday Text embossing folder. You only see a peek of that behind the watercolored panel, but it adds a nice pretty color and texture.


For the watercolor panel, I used a piece of Spectrum Aqua Watercolor Cardstock and blended Distress Inks in Dusty Concord, Spicy Marmalade, Tumbled Glass and Scattered Straw. I used sponges to blend this. After I blended it to my liking, I flicked on some water and let that dry. Since Distress Inks react with water, it leaves a really pretty look when it's all dry!

I then stamped the birthday balloons with Versafine in Onyx Black onto the watercolored panel. I stamped a second set of balloons onto the Watercolor Cardstock and colored them in with Spectrum Aqua Markers (all products listed and linked below) to color them in. Such a fun way to bring in a lot of color fairly easily and quickly. After they dried, I fussy cut them out and adhered them right over the first group of balloons I stamped with some foam adhesive. Gives great dimension to your projects!


For the sentiment, I simply took a strip of the Watercolor Cardstock and stamped the two sentiments from the Bebunni Celebration set and stamped them next to each other and glued that strip to the bottom of the watercolored panel.


I encourage you to check out all the wonderful watercoloring items over at Crafter's Companion. It's such a beautiful way to add gorgeous results to all your projects. Happy crafting!

PRODUCTS USED:

Monday, March 7, 2016

Lawnscaping Challenge #125: Splash of Color Sponsored by Ellen Hutson


Another Monday, another challenge!! This is seriously the best thing about Monday to me. Today's Lawnscaping Challenge is Color Splash. Make a black and white creation with a splash of color. Sounds easy, right? It was actually really fun but also challenging.

Our sponsor for this challenge is Ellen Hutson. SO MANY PRODUCTS! Thank you for sponsoring this challenge! Check out the site for many amazing things to help you with your crafting desires wants NEEDS. ;)


I had an idea in mind and it came out just like I had envisioned it. I LOVE this. I honestly might make a lot more of these types of cards using black and white with a splash of color. It's really different and fun.


Isn't that fun?! This was the perfect set to me for this challenge. I've linked up all the supplies I used below. But I love the bright pop of colors in the butterfly against all that black and white. What do you think?


I used foam adhesive to pop up the hello bubble and butterfly to make them stand out even more. It's a great way to make a little more impact!


I hope you're inspired and I sparked some creative juices in you to enter this challenge. GREAT prize. 

SUPPLIES USED:

Lawn Fawnatics Challenge #8: Summertime Fun

  It's challenge time over at Lawn Fawnatics! This is challenge #8 which is summertime fun.  I mean, we are in the thick of summe...